Many times we need to mark multiple items at the same time when using a laser marking machine. At this moment, we need to distinguish the marking order for each object . How do we set the marking order in marking software ? Let's take a look at the tutorial below:
1. First, open the laser marking software. Here we show the EZCAD software (A professional laser marking machine software). Let's take text as an example. For example, If we want to type three paragraphs of text, we first need to create the text of the three paragraphs ABC.
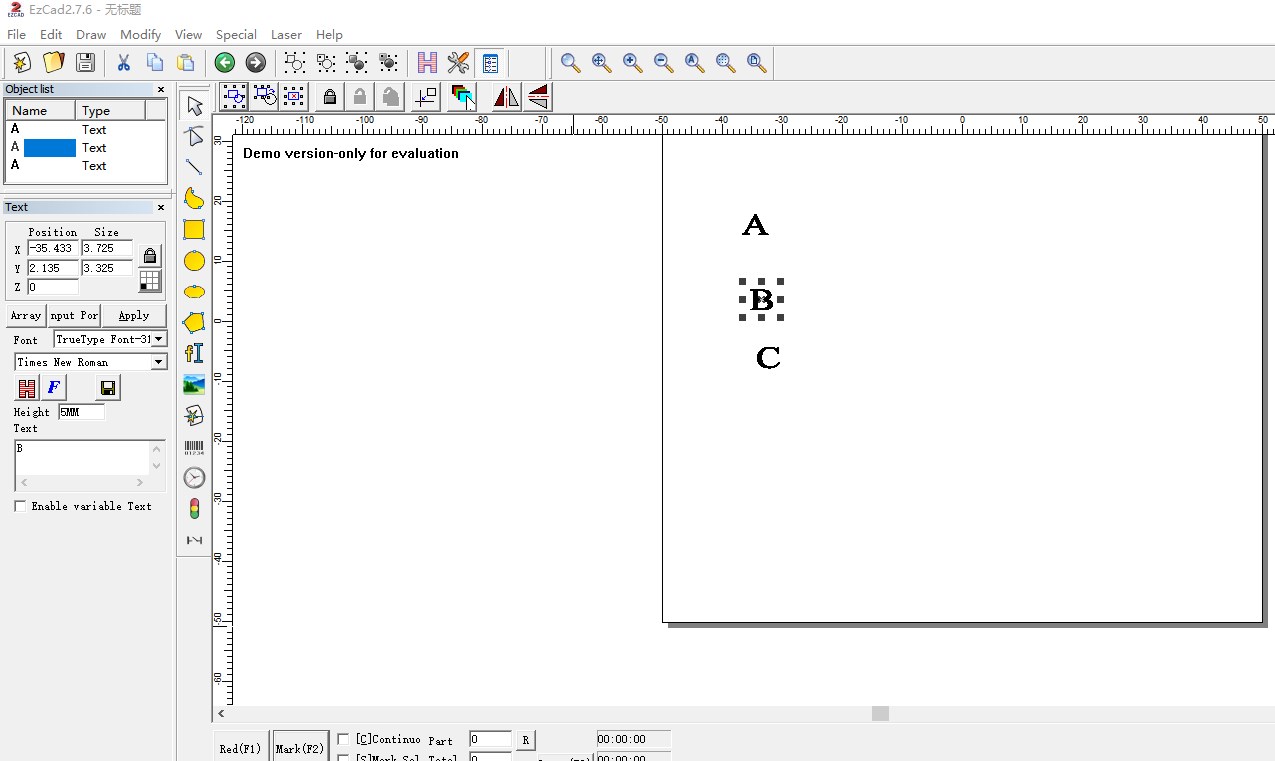
At this moment, these three texts can be arranged at will in the working area. The key point we should pay attention to is that there will be 3 text objects in the object list window on the left side of the software. These 3 text objects are arranged from top to bottom in the order of 123.
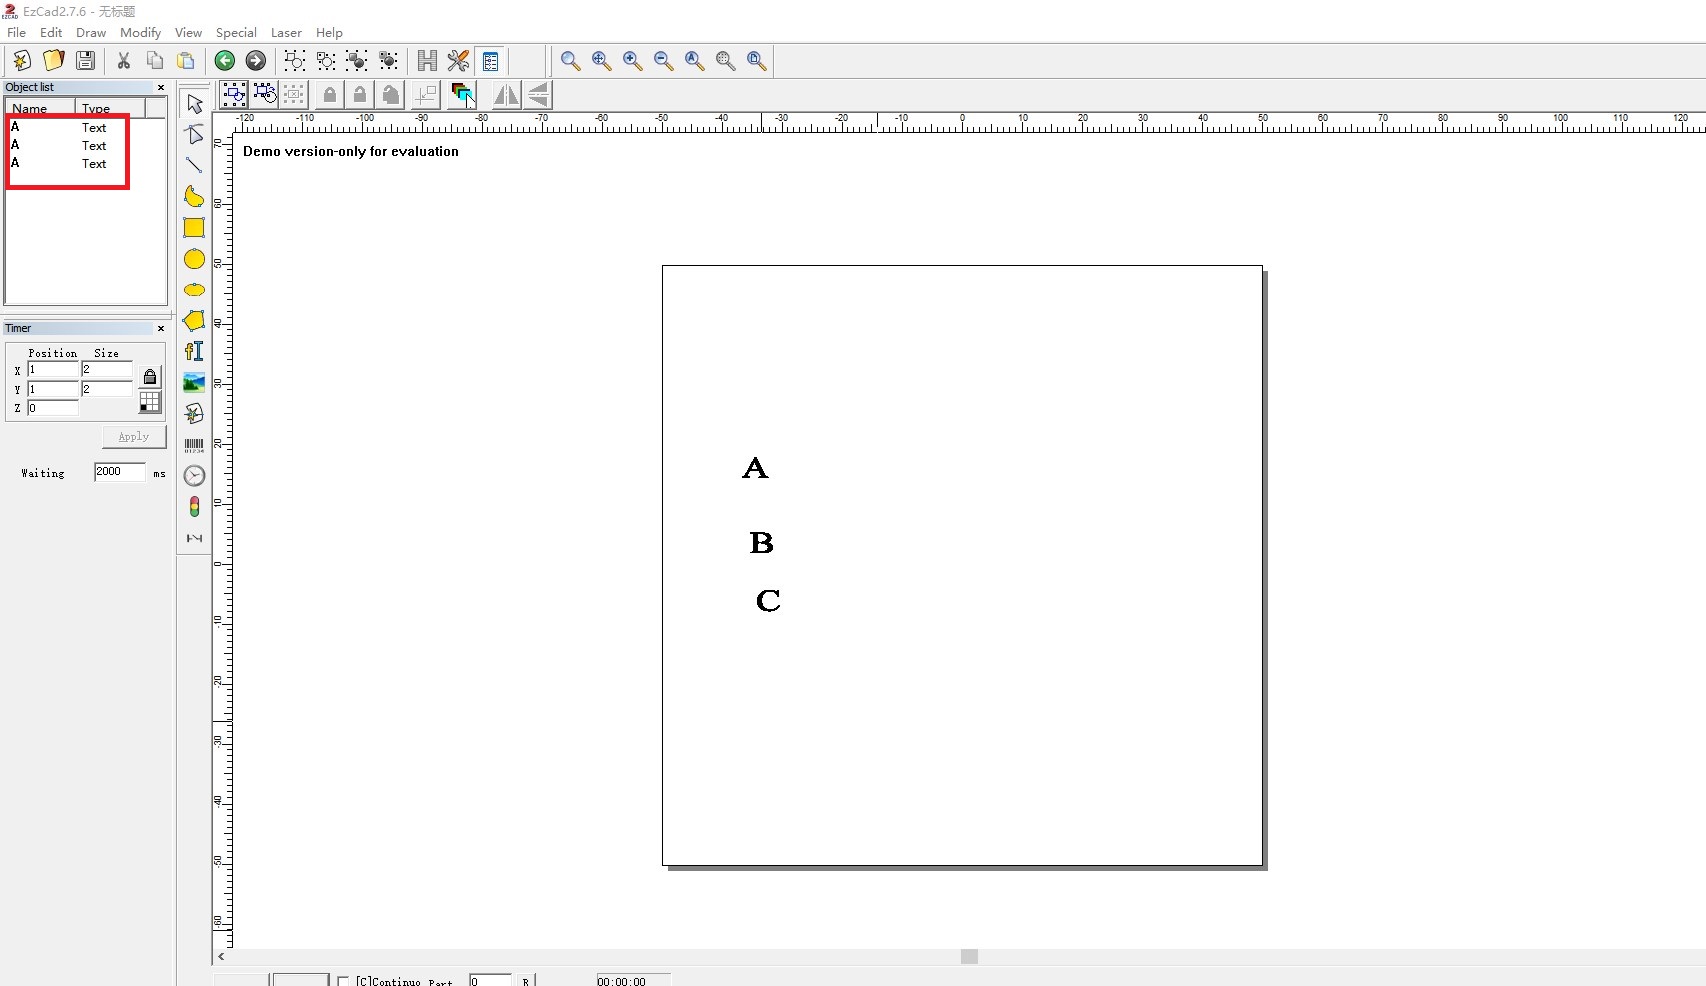
We need to select the second text object with the mouse. At this time, text B in the workspace will be selected. If we want to mark this text first. We right-click in the object list window and a new window will appear as below:
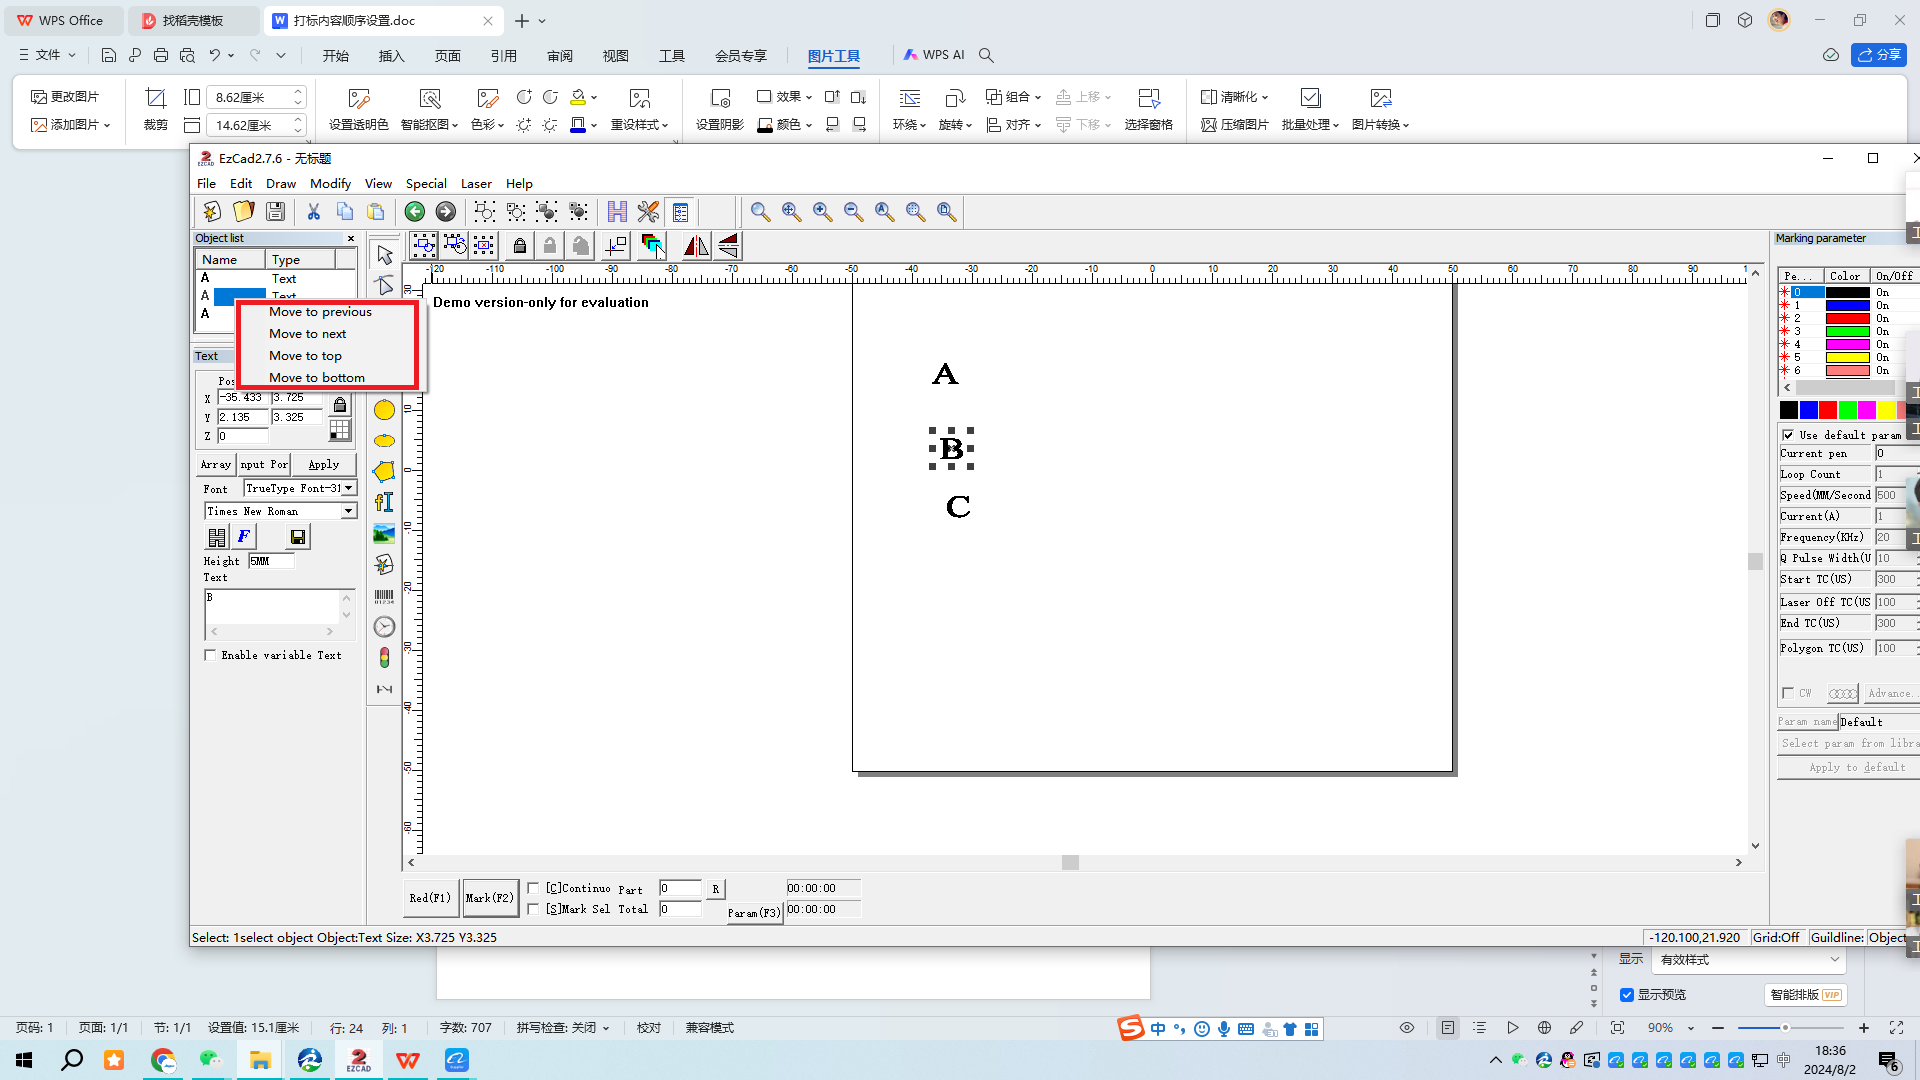
We move it to the front. At this time, text B will become the first, which means that text B will be marked first.
We can also hold down the left button of the mouse to drag its position. After the above tutorials and cases, we can easily change the marking order in laser marking software. If It is a graphic or vector file, the operation steps are the same. We can also use the above method to set the marking order.
In addition, It is worth noting that the pause time needs to be set during the marking process. We can add a delay device “Timer” in the middle of a certain object list and click the clock-like icon on the toolbar with the mouse. This is the setting of the delay device.
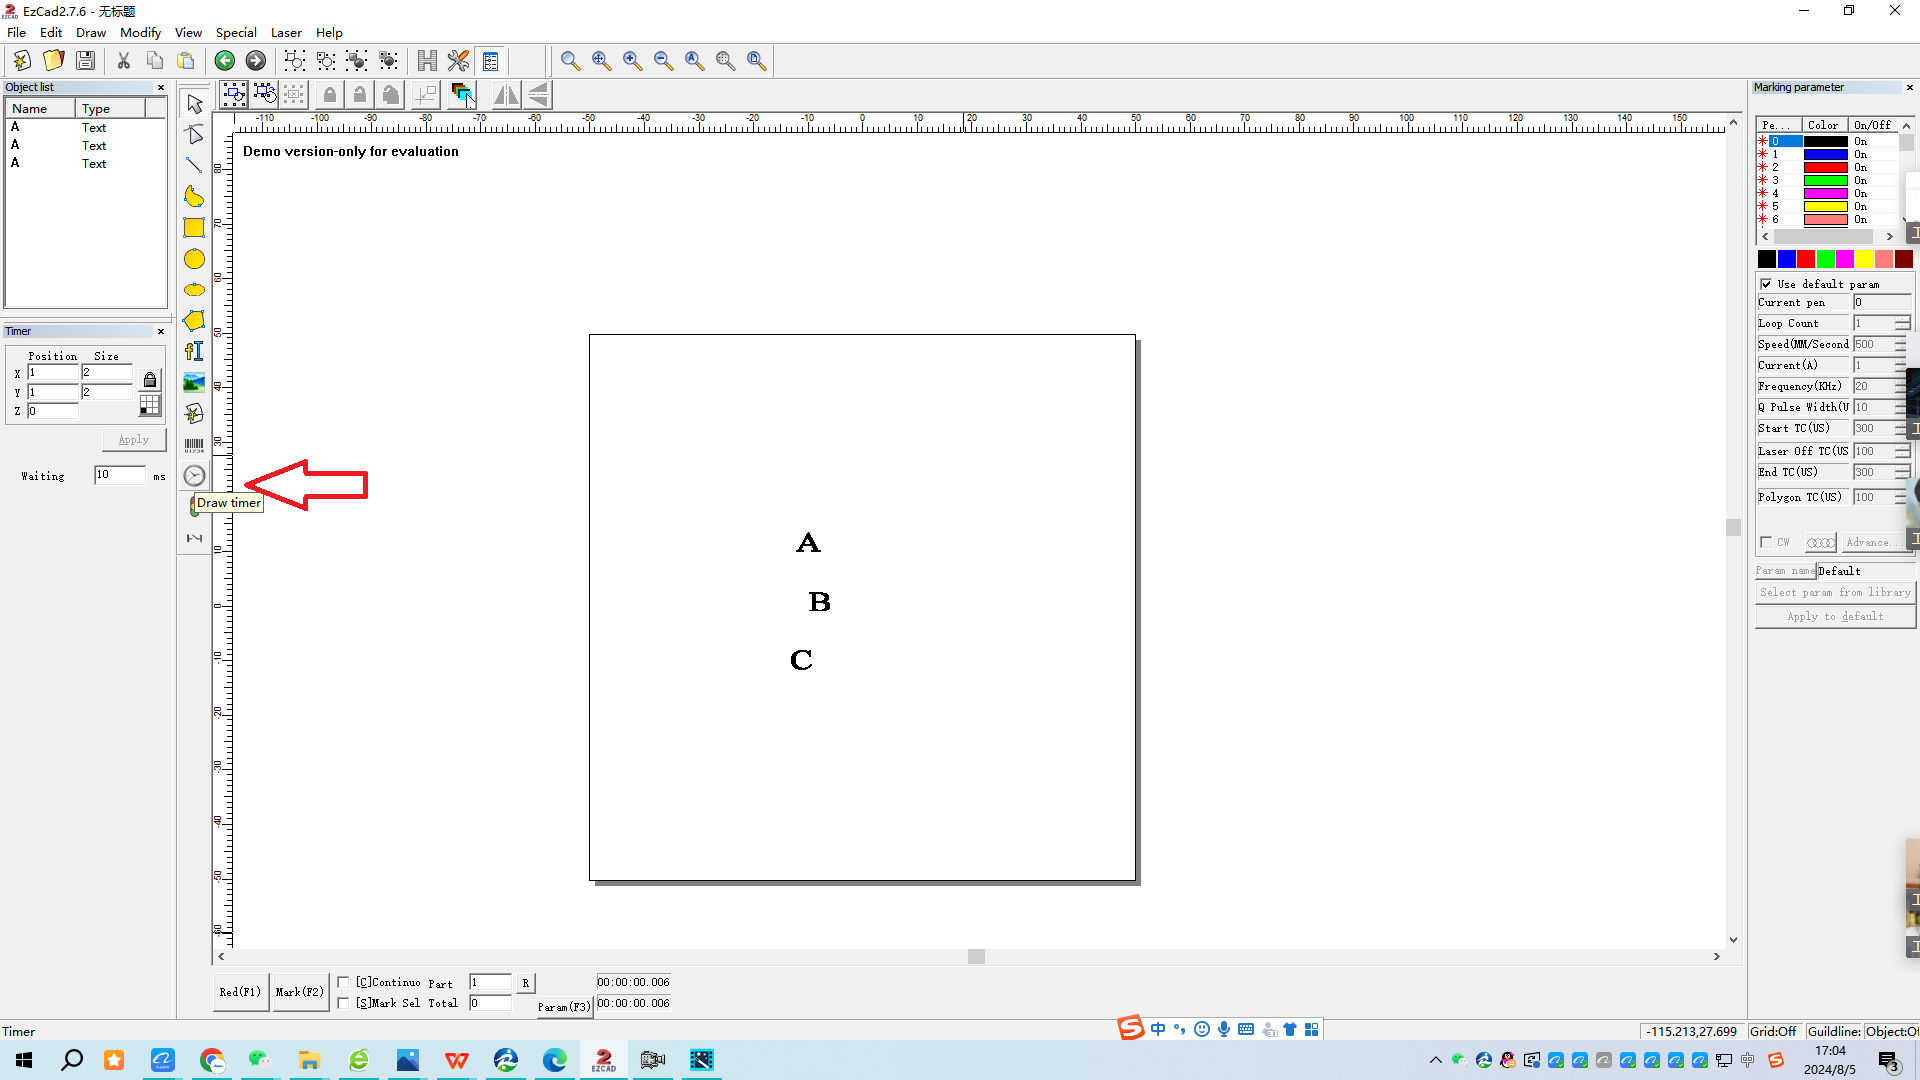
After clicking the “Timer", Timer setting window will appear at the left side of the software, which contains a waiting time of ten milliseconds.
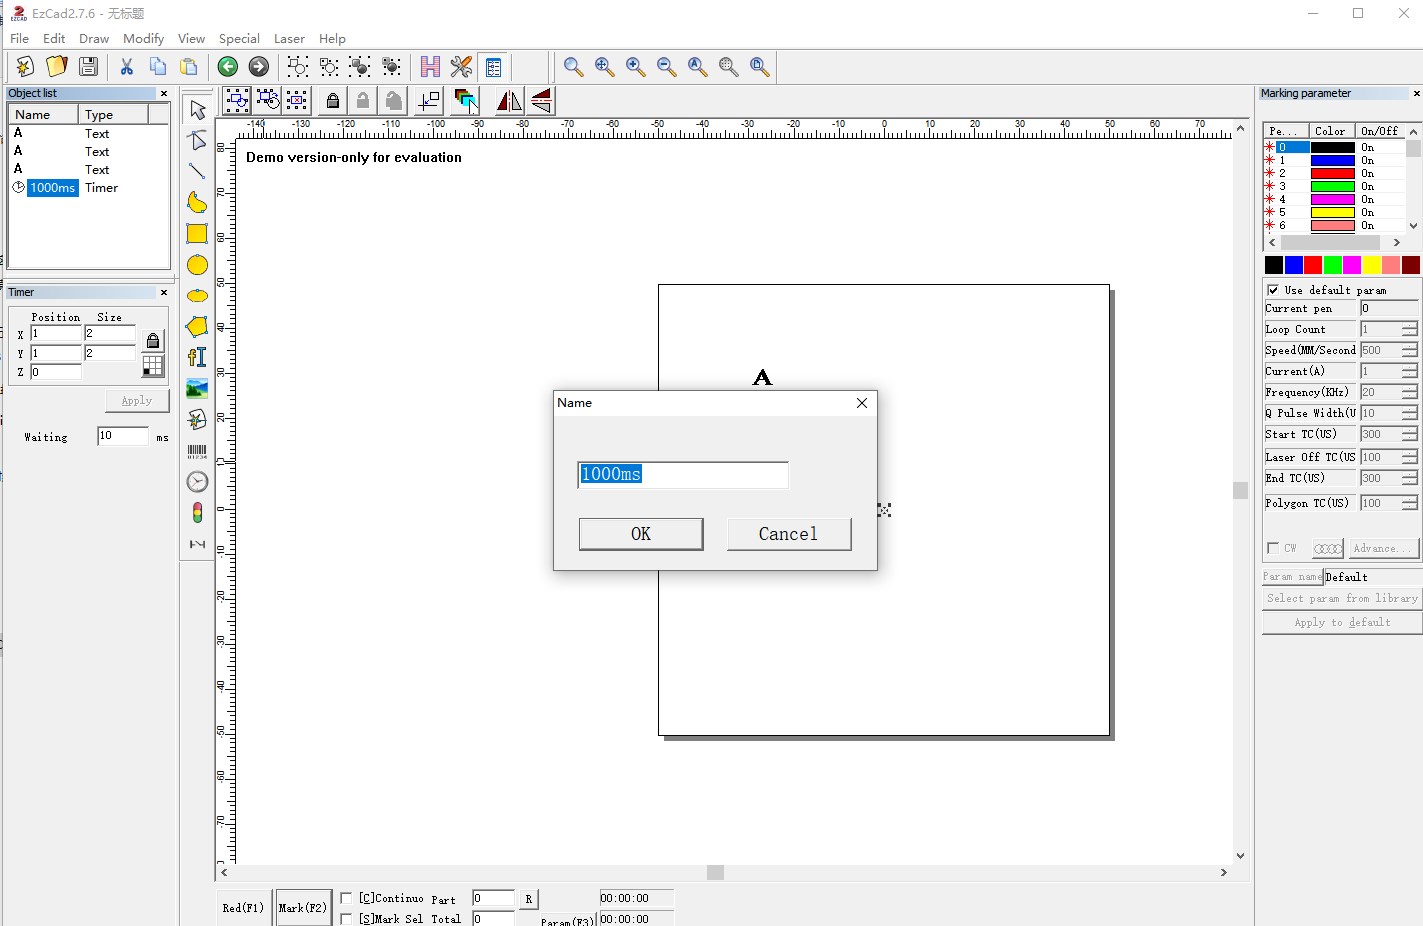
1000 milliseconds equals one second, and we can set the corresponding time. After the setting is completed, we can drag the Timer to the place where we need to delay, that is, drag it between the objects. The above is the introduction to the setting of the marking order of the laser marking machine. The marking order setting is a very simple problem.
The above is the introduction to the setting of the marking sequence of the laser marking machine. The setting of the marking sequence is a very simple problem. I hope it can help you easily solve various problems of the marking machine. This tutorial is set for EZCAD software. I hope it will be useful to you. If you have any questions, please contact us.